As an ASP.Net MVC developer, you may frequently involved with these terms like Tempdata, viewdata and viewbag. In this post, I’m going to take a close look about TempData and how it works.
Read: ViewBag, ViewData and TempData
For explanation purpose, I’m going to create a small MVC project with 3 views and a controller.
- Index.cshtml – This is the default view, which is loaded by the default action method.
- Page1.cshtml
- Page2.cshtml
- DefaultController.cs
TempData:
We will start with TempData. I will set the value of TempData in the Action method “Index”, like below:
In the “Index” view, we can get the value of the initialized “Tempdata” value as below:
Please take a close look how the value is retrieved from the “TempData”.You can’t directly assigned to it the specific type. A typecasting is needed, when you retrieved the value from Tempdata. The above snippet just get the value from TempData dictionary and print it on.
In the next snippet, I’m going to change the above snippet a little bit like below:

The above result confirm that, you can read the TempData value inside
the current request as much time as possible.
In the following snippet, I’m going to read the value of the TempData in the
next view, which is rendered by the action method “Page1”.
 Wait! The conclusion is not yet over. I want to try some thing more. That is,
as per the above codes:
Wait! The conclusion is not yet over. I want to try some thing more. That is,
as per the above codes:
1. First I render the “Index” page, where the Tempdata value is read and print it.
2. After I call the action method “Page1”.
What will happens if I didn’t read the value of Tempdata in “Index.cshtml” view and try to read the “Page1.cshtml” view. In order to test, I made the below changes in Index view.
Index.cshtml:

 If you refresh the above page, you will get the result as below: that is, the
Tempdata is unavailable once it read. So you get the Tempdata value as empty.
If you refresh the above page, you will get the result as below: that is, the
Tempdata is unavailable once it read. So you get the Tempdata value as empty.
 So the conclusion is : After Tempdata value is initialized and it’s
not yet read in the current request, then it will be available in the next
request. Once it is read, it will not available.
So the conclusion is : After Tempdata value is initialized and it’s
not yet read in the current request, then it will be available in the next
request. Once it is read, it will not available.
Few words about Keep() and Peek() method:
After you read the tempdata, if you call the keep method, it will marks the all tempdata keys or specific key for retention.
If you want to fetch the key and mark the key for retention (keep the key for the next request) then you can go with Peek method.
Connection between Session and Tempdata:
Yes, Tempdata uses “Session” object in the backend. That is, whenever you use a tempdata it will handled by session. But the main difference is, the Tempdata will be removed (by default) after the first read.
At the same time, you may have the doubt, that either tempdata is specific to the user as like as “Session”? The answer is Yes. Since the Tempdata, is backed up with Session, Tempdata is also specific to user, like Session object.
Also, the another question is, since the Tempdata backed up with Session, what will happened if we go with same key for session and Tempdata as like below:
The answer is it won’t colloid. It will considered as a different one and it will serve its own purpose as per the convention.
In summary:
We will start with TempData. I will set the value of TempData in the Action method “Index”, like below:
using System.Web.Mvc;
namespace SessionHandlingInMVC.Controllers
{
    public class
DefaultController : Controller
    {
        // GET: Default
public ActionResult Index()
        {
          TempData["MyTempDataValue"] = "Value initialized in Index Action Method";
          return View();
        }

public ActionResult Page1()
        {
            return View("Page1");
        }
public ActionResult Page2()
        {
      return View("Page2");
        }
    }
}
In the “Index” view, we can get the value of the initialized “Tempdata” value as below:
<h2>Index Page</h2>
<p>
   @{
       string strTempDataValue =
(string)TempData["MyTempDataValue"];
    }
    @strTempDataValue
</p>
Please take a close look how the value is retrieved from the “TempData”.You can’t directly assigned to it the specific type. A typecasting is needed, when you retrieved the value from Tempdata. The above snippet just get the value from TempData dictionary and print it on.
In the next snippet, I’m going to change the above snippet a little bit like below:
<h2>Index Page</h2>
<p>
   @{
       string
strTempDataValue = (string)TempData["MyTempDataValue"];
    }
@strTempDataValue
    @{
        string strAnotherRead =
(string)TempData["MyTempDataValue"];
    }
    @strAnotherRead
</p>
In the above snippet, we have read the TempData value as twice. As a result
the value also printed twice in the view.
<h2>Page1</h2>
<p>
    @{
        string
strTempDataValueInPage1 = (string)TempData["MyTempDataValue"];
    }

@strTempDataValueInPage1
</p>
In order to test the above scenario, first you must render the view “Index”
(since in that action method alone the tempdata value is initialized) and then
you call the “Page1” view. As you can see that, TempData value is not available in the next request.
1. First I render the “Index” page, where the Tempdata value is read and print it.
2. After I call the action method “Page1”.
What will happens if I didn’t read the value of Tempdata in “Index.cshtml” view and try to read the “Page1.cshtml” view. In order to test, I made the below changes in Index view.
Index.cshtml:
<h2>Index Page</h2>
<p>
    No Temp Data read here
in Index.cshtml
</p>
Page1.cshtml:
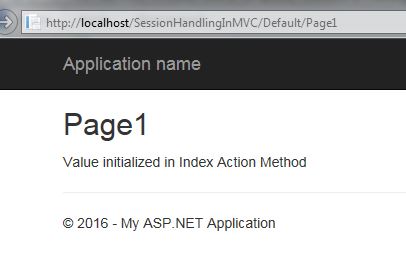
<h2>Page1</h2>
<p>
    @{
        string
strTempDataValueInPage1 = (string)TempData["MyTempDataValue"];
    }

@strTempDataValueInPage1
</p>
Now, you got the value in the value of Tempdata in the next request. That means,
your first request render the “Index” page, and the next request render the
“Page1”.

Few words about Keep() and Peek() method:
After you read the tempdata, if you call the keep method, it will marks the all tempdata keys or specific key for retention.
If you want to fetch the key and mark the key for retention (keep the key for the next request) then you can go with Peek method.
Connection between Session and Tempdata:
Yes, Tempdata uses “Session” object in the backend. That is, whenever you use a tempdata it will handled by session. But the main difference is, the Tempdata will be removed (by default) after the first read.
At the same time, you may have the doubt, that either tempdata is specific to the user as like as “Session”? The answer is Yes. Since the Tempdata, is backed up with Session, Tempdata is also specific to user, like Session object.
Also, the another question is, since the Tempdata backed up with Session, what will happened if we go with same key for session and Tempdata as like below:
The answer is it won’t colloid. It will considered as a different one and it will serve its own purpose as per the convention.
In summary:
- TempData store the value using key.
- TempData backed up with Session.
- Need type casting when the stored value retrieved.
- The life time of tempdata is little bit tricky. It will be available till you read it first time. After you read it, it will be marked for deletion. So in the next request, it won’t available. However, you can extend it’s life time by using keep and peek method.