Banner Ad

Tuesday, August 18, 2015

How to Send SMS From ASP.Net Web Application?

By Francis   Posted at   7:14 PM   SMS Gateways 20 comments
Disclaimer:
            In this article I have used a Third party SMS Gateway service provider, which is I have personally used and experienced.
Introduction:
                    In my previous article I explained SMS Gateways and the various schemes available for them. This article explains how to integrate those SMS gateways into an ASP.Net web application.
What a "SMS Gateway" is?
                   A SMS Gateway allows a computer to send or receive SMS to or from a telecommunications network. This Wikipedia URL provides more detail.
Some “facts” about SMS Gateways
                  When I did some experimentation and Googling of SMS gateways some of the tutorials suggested use of “free” SMS gateways. But nothing worked for me. Latter I understood that “Nothing comes free”. Also most people asked the same question: “Is there any free SMS service is available to send SMS from my website?”. In my experience the answer is no. So my point here is, don’t waste your time searching for the free API. Instead, find a well-suited SMS Gateway provider and sign up with them.

Sunday, July 26, 2015

Visual Studio Tips and Tricks-12 : Create ASP.NET 5 Website in Visual Studio 2015(Community Edition)

By Francis   Posted at   11:19 AM   Visual Studio Tips and Tricks No comments

1) Open Visual Studio 2015.

2) Select File –> New –> Project

3) In the “New Project” window, select Templates –> Visual C# –> ASP.NET Web Application. Give valid name and select location then click “OK”.

NewProject-Window

4) During this post, ASP.Net 5 is in Preview. So in the next screen you can see the “ASP.Net 5 Preview Template” and select “Website”.

TemplateWindow

5) That’s it! You have created ASP.Net 5 website. It looks like below:

ASPNet5_Website


Happy Coding!!!

Monday, June 29, 2015

Visual Studio Tips and Tricks–11 : Various ways to open Visual Studio IDE in Windows

By Francis   Posted at   10:51 AM   Visual Studio Tips and Tricks No comments

In my previous articles I have explained various of tips and tricks for Visual studio. In this post i ‘m going to explain various ways that are available to open the Visual Studio IDE.


Way #1:

Click the Start button and type “v” in the “search” box. It will listed the programs (including Visual Studio) and select the Visual Studio.

image


Way #2:

Click “Start” button and type “devenv” in “Search” box. “Devenv” is the short form for “Development Environment”, which denotes Visual Studio in Windows OS.


image


Way #3:

Windows 7 offers the concept called “pin and unpin the programs” in task bar. Just pin the Visual Studio in task bar as shown below. This is another shortcut to open VS in a quicker manner.

image

Sunday, February 22, 2015

Gridview : Highlight Row/Cell using JQuery

By Francis   Posted at   3:16 PM   Gridview No comments
                         As an ASP.Net developer every one experience with the most prominent Gridview. In this article I'm going to couple all types of "highlighting" rows/column using JQuery.

Problem:
You may need to achieve any one of these following:
1. Highlight the row when mouse over on it in a grid view.


2. Highlight the cell when mouse over on it

3. Highlight a row of the gridview when click on the row.


4. Highlight a cell on a gridview when click on the cell.


prerequisite:
               This tutorial rely on JQuery purely. So you need to include the jquery library on your solution. You can download JQuery from here.

Code:

           As a first step, we need some data to be filled in Gridview. For this purpose, I have created a simple table "tblEmployee" with some columns. 


CREATE TABLE [dbo].[tblEmployee](
	[EmpID] [int] NOT NULL,
	[EmpName] [varchar](50) COLLATE SQL_Latin1_General_CP1_CI_AS NOT NULL,
	[EmpAge] [int] NOT NULL,
 CONSTRAINT [PK_tblEmp] PRIMARY KEY CLUSTERED 
(
	[EmpID] ASC
)WITH (IGNORE_DUP_KEY = OFF) ON [PRIMARY]

) ON [PRIMARY]

Use the below script to insert values in to that table:


insert into tblEmployee values (1,'Francis',30);
insert into tblEmployee values (2,'Ram',25);
insert into tblEmployee values (3,'Arul',25);
insert into tblEmployee values (4,'Prabhu',30);


As a next step, create a webform and include a grid view into it as below:


<%@ Page Language="C#" AutoEventWireup="true" CodeBehind="GridviewDemo.aspx.cs" Inherits="DemoWebApp.GridviewDemo" %>
<!DOCTYPE html>
<html xmlns="http://www.w3.org/1999/xhtml">
<head runat="server">
    <title></title>
</head>
<body>
    <form id="form1" runat="server">
        <div>
            <asp:GridView ID="gvEmployee" runat="server" EmptyDataText="No Records Found" AutoGenerateColumns="false" >
                <Columns>
                    <asp:BoundField HeaderText="SNo" DataField="EmpID" />
                    <asp:BoundField HeaderText="Employee Name" DataField="EmpName" />
                    <asp:BoundField HeaderText="Age" DataField="EmpAge"  />
                </Columns>
            </asp:GridView>
        </div>
    </form>
</body>
</html>

The below code in the code-behind file used to check the post-back and call the method to bind the data table to  grid view.

        protected void Page_Load(object sender, EventArgs e)
        {
            if (!Page.IsPostBack)
            {
                // Bind the grid
                gvEmployee.DataSource = GetDataFromDB();
                gvEmployee.DataBind();
            }
        }

The below function is used to get data from Database and return a data table.
 
    private DataTable GetDataFromDB()
        {
            DataTable dt = new DataTable();
            // Read Connection String from WebConfig
            string strConString = ConfigurationManager.ConnectionStrings["MyConString"].ToString();
            // Create connection object
            using (SqlConnection con = new SqlConnection(strConString))
            {
                string strQuery = "Select * from tblEmployee";
                // open connection
                con.Open();
                // create command object
                SqlCommand cmd = new SqlCommand(strQuery, con);
                // create adapter 
                SqlDataAdapter da = new SqlDataAdapter(cmd);
                // execute query and fill the data into datatable
                da.Fill(dt);
            }
            return dt;
        }
We are going to define the following "style" classes in the aspx file itself. These classes are going to be used in JQuery to highlight the row/cell.
 
<style type="text/css">
        .selectedCell {
            background-color: lightblue;
        }

        .unselectedCell {
            background-color: white;
        }
    </style>

In the next step I'm going to add the JQuery in the aspx file (between the <script>  and </script> tag). The below JQuery snippet is used to highlight the row when mouse over on it.


        // Highlight the row when mouse over on it
        $(document).ready(function () {
            $('#gvEmployee tr').hover(function () {
                $(this).addClass('selectedCell');
            }, function () { $(this).removeClass('selectedCell'); });
        });

Include the below JQuery code if you want to highlight the cell instead of row:
        // Highlight the cell when mouse over on it
        $(document).ready(function () {
            $('#gvEmployee td').hover(function () {
                $(this).addClass('selectedCell');
            }, function () { $(this).removeClass('selectedCell'); });
        }); 

The below JQuery is used to highlight the row when the particular row is clicked.
 
        //Highlight the cell when the row clicked
        $(function () {
            $(document).on('click', '#gvEmployee tr', function () {
                $("#gvEmployee tr").removeClass('selectCell');
                $(this).addClass('selectCell');
            });
        });
Include the below Jquery code if you want to highlight the cell when the particular cell clicked.
 
       //Highlight the cell when the row clicked
        $(function () {
            $(document).on('click', '#gvEmployee tr', function () {
                $("#gvEmployee tr").removeClass('selectCell');
                $(this).addClass('selectCell');
            });
        });

Highlight row/cell based on some condition:

                             In some cases you may want to highlight the row or cells based on some condition too. In that case, you can use "RowDataBound" event of Gridview. For an example, i'm going to highlight the row based on the "age" column value.

        protected void gvEmployee_RowDataBound(object sender, GridViewRowEventArgs e)
        {
            if (e.Row.RowType == DataControlRowType.DataRow)
            {
                int age = Convert.ToInt32(e.Row.Cells[2].Text.ToString());
                if (age >= 25 && age < 30)
                {
                    e.Row.BackColor = Color.GreenYellow;
                }
                if (age == 30)
                {
                    e.Row.BackColor = Color.LightBlue;
                }
            }
        }
The output is look alike below:
Highlight Rows on Databound
 In another way, you may want to highlight the column alone while binding the data, the below code accomplish this.
        protected void gvEmployee_RowDataBound(object sender, GridViewRowEventArgs e)
        {
            if (e.Row.RowType == DataControlRowType.DataRow)
            {
                int age = Convert.ToInt32(e.Row.Cells[2].Text.ToString());
                if (age >= 25 && age < 30)
                {
                    e.Row.Cells[2].BackColor = Color.GreenYellow;
                }
                if (age == 30)
                {
                    e.Row.Cells[2].BackColor = Color.LightBlue;
                }
            }
        }
The above code output like below:
Highlight Column on Databound
If you have any clarifications let me know your thoughts as comment!


Sunday, February 15, 2015

iTextSharp : Convert a text file to PDF while uploading in ASP.Net

By Francis   Posted at   1:04 AM   Text to PDF No comments
iTextSharp is a most popular PDF Library to create,modify and do some additional manipulation with PDF files. In this article, I’m going to explain how to convert an text file to PDF while uploading.
Ground work:
                           Before starting we need to download the iTextSharp PDF library from this url. Alternatively we can download the same from NuGet Gallary, in to your project solution by using the “NuGet Package Manager”, if you are using Visual Studio. This can be depicted below with screen shots.


Code:
In order to simplicity, I have designed the webform with a upload control and a button. So the markup look like this:
<!DOCTYPE html>

<html xmlns="http://www.w3.org/1999/xhtml">
<head runat="server">
    <title></title>
</head>
<body>
    <form id="form1" runat="server">
        <div>
            <asp:Label ID="lbl" runat="server" Text="Select a file to upload:"></asp:Label>
            <asp:FileUpload runat="server" ID="fu" /><br />
            <asp:Button runat="server" ID="btnUpload" Text="Upload" OnClick="btnUpload_Click" />
        </div>
    </form>
</body>
</html>

Also the code behind contains the below code:

protected void btnUpload_Click(object sender, EventArgs e)
        {
            // Check that upload control had file
            if(fu.HasFile)
            {
                // Get the Posted File
                HttpPostedFile pf = fu.PostedFile;
                Int32 fileLen;
                // Get the Posted file Content Length
                fileLen = fu.PostedFile.ContentLength;
                // Create a byte array with content length
                Byte[] Input = new Byte[fileLen];
                // Create stream
                System.IO.Stream myStream;
                 // get the stream of uploaded file
                myStream = fu.FileContent;
                // Read from the stream
                myStream.Read(Input, 0, fileLen);
                // Create a Document
                Document doc = new Document();
                // create PDF File and create a writer on it
                PdfWriter writer = PdfWriter.GetInstance(doc, new FileStream(string.Concat(Server.MapPath("~/Pdf/PdfSample"), ".pdf"), FileMode.Create));
                // open the document
                doc.Open();
                // Add the text file contents
                doc.Add(new Paragraph(System.Text.Encoding.Default.GetString(Input)));
                // Close the document
                doc.Close();
            }
        }


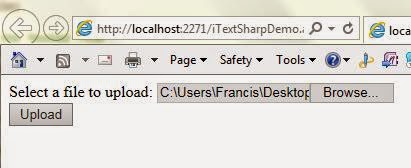
When you run the application, it will display an upload control and a button to upload.
After the conversion, the PDF file stored under the “PDF” folder. As per the code it is necessary to create the folder named “PDF” before run the application, with in your solution.


Happy Coding!!!

Connect with Us