Banner Ad

Sunday, February 15, 2015

iTextSharp : Convert a text file to PDF while uploading in ASP.Net

By Francis   Posted at   1:04 AM   Text to PDF No comments
iTextSharp is a most popular PDF Library to create,modify and do some additional manipulation with PDF files. In this article, I’m going to explain how to convert an text file to PDF while uploading.
Ground work:
                           Before starting we need to download the iTextSharp PDF library from this url. Alternatively we can download the same from NuGet Gallary, in to your project solution by using the “NuGet Package Manager”, if you are using Visual Studio. This can be depicted below with screen shots.


Code:
In order to simplicity, I have designed the webform with a upload control and a button. So the markup look like this:
<!DOCTYPE html>

<html xmlns="http://www.w3.org/1999/xhtml">
<head runat="server">
    <title></title>
</head>
<body>
    <form id="form1" runat="server">
        <div>
            <asp:Label ID="lbl" runat="server" Text="Select a file to upload:"></asp:Label>
            <asp:FileUpload runat="server" ID="fu" /><br />
            <asp:Button runat="server" ID="btnUpload" Text="Upload" OnClick="btnUpload_Click" />
        </div>
    </form>
</body>
</html>

Also the code behind contains the below code:

protected void btnUpload_Click(object sender, EventArgs e)
        {
            // Check that upload control had file
            if(fu.HasFile)
            {
                // Get the Posted File
                HttpPostedFile pf = fu.PostedFile;
                Int32 fileLen;
                // Get the Posted file Content Length
                fileLen = fu.PostedFile.ContentLength;
                // Create a byte array with content length
                Byte[] Input = new Byte[fileLen];
                // Create stream
                System.IO.Stream myStream;
                 // get the stream of uploaded file
                myStream = fu.FileContent;
                // Read from the stream
                myStream.Read(Input, 0, fileLen);
                // Create a Document
                Document doc = new Document();
                // create PDF File and create a writer on it
                PdfWriter writer = PdfWriter.GetInstance(doc, new FileStream(string.Concat(Server.MapPath("~/Pdf/PdfSample"), ".pdf"), FileMode.Create));
                // open the document
                doc.Open();
                // Add the text file contents
                doc.Add(new Paragraph(System.Text.Encoding.Default.GetString(Input)));
                // Close the document
                doc.Close();
            }
        }


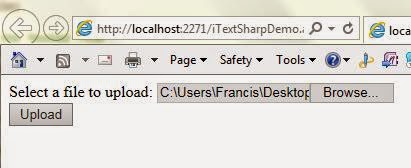
When you run the application, it will display an upload control and a button to upload.
After the conversion, the PDF file stored under the “PDF” folder. As per the code it is necessary to create the folder named “PDF” before run the application, with in your solution.


Happy Coding!!!

Monday, January 19, 2015

Visual Studio Tips & Tricks–10 : How to Change the color theme in Visual Studio 2015?

By Francis   Posted at   7:41 PM   Visual Studio Tips and Tricks No comments
                                  Go to Tools –> Options Menu. In the Options dialog, expand “Environment” and then select “General” node. On the right hand side, under the heading “Visual experience”, you can find the “Color theme” dropdown, which contains the the list of themes. Select one of them, you interested and click “OK”. That’s all you have changed the theme successfully!!

Tools_Menu

Options_Menu

Sunday, January 18, 2015

Visual Studio Tips & Tricks – 9 : How to Change the menu to text to “title case” in Visual Studio 2015?

By Francis   Posted at   12:09 PM   No comments
                           Till Visual Studio 2010, we saw all the menu’s text displayed in “title case”, that is First letter alone in capital letter and the remaining letters are in small case. But from Visual studio 2012 onwards, the default settings for the menu items displayed fully in Capital letter. This can be also easily changed. Go to “Tools –> Options”. In the “Options” dialog, expand “Environment” and select “General”. Check the “Apply title case styling to menu bar” and click “OK”. Congrats!! you have changed the menu’s text as title case!


Sunday, December 21, 2014

An easy way to construct the Connection String in ASP.Net

By Francis   Posted at   7:26 AM   Connection String 2 comments

Connection strings are necessary when you want to interact with any databases like SQL Server, MSAccess etc. Most probably if you are using ADO.Net Concepts to interact with Database then you can aware about the connection string. In this article I am going to share how it can be easily constructed.


Step 1:

Open Visual Studio and create sample web form application.


Step 2:

Switch over to “Design Mode” and in the tool box, just drag and drop a “Gridview” control in to the web form.

DesignMode-1


Step 3:

Select “New Data Source”.

DesignMode-2

Step 4:

In the “Data Source Configuration Wizard”, select your database click “OK”.

Datasource-1

Step 5:

In the next step of the wizard, Click “New Connection”.

Datasource-2

Step 6:

It will provide a pop-up dialog box to select “Data Source”, in that select “Data Source” and select data provider from “Data Provider” dropdown list, then click “Continue”.

Datasource-3

Step 7:

In “Add Connection” modal dialog, select your “Server Name” (if not available, first click “Refresh” button, still it not available type your “SQL Server Name” manually on it).

You can either use, “Windows Authentication” or “SQL Server Authentication” to login to your SQL Server.

As a next step, select your database, that is available on your SQL Server. Finally, click “Test Connection”, to check whether the connection is established successfully or not.

Datasource-4


Datasource-5

Step 8:

As a final step, you will get the Connection string, which can be used on your web/windows application to connect the DB.

Datasource-6

Happy Coding!

Saturday, December 20, 2014

ASP.Net MVC – Create Custom HTML Helpers

By Francis   Posted at   11:52 AM   Razor No comments
Html Helpers are classes that helps to render HTML controls in Views. We can also create our own HTML Helpers. In this post, I’m going to explain how to create a simple Custom HTML Helper. The main purpose creating custom HTML helper is reuseability.

Step 1:
          Create a static class and add method to it like below.
using System;
using System.Collections.Generic;
using System.Linq;
using System.Web;
using System.Web.Mvc;
namespace MVCTutorial
{
    public static class CustomHTMLHelper
    {
        public static MvcHtmlString ImageLink(string action, string controller, string imgageURL)
        {
            // Create a link with an image
            return MvcHtmlString.Create(String.Format("<a href=\"{1}\\{0}\"> <img src=\"{2}\" /></a>", action, controller, imgageURL));
        }
    }
}

     
Step 2:
          Access the custom helper class in a View.
<!DOCTYPE html>
<html>
<head>
    <meta name="viewport" content="width=device-width" />
    <title>Sample</title>
</head>
<body>
    <div>
        @CustomHTMLHelper.ImageLink("Home","Account","your image url")
    </div>
</body>
</html>


The helper class is static, since it can be called in a easy manner also handy.
Happy coding!
Connect with Us