In this article I’m going to explain about how to install/uninstall Nuget packages for your application in Visual Studio using “Nuget Package Manager” and “Package Manager Console”. I assume that you have Visual Studio 2013/2015 on your machine.
Before that, if you are not aware about “Nuget” means, the below sentence is for you:
“NuGet is the package manager for the Microsoft development platform including .NET. The NuGet client tools provide the ability to produce and consume packages. The NuGet Gallery is the central package repository used by all package authors and consumers.”
Install Nuget Package using ‘Nuget Package Manager’:
Step 1:
Rightclick on your project and select “Manage Nuget Packages”.
Step 2:
Now the “Nuget Package Manager” window will appear with the list of nuget packages.
Step 3:
In the search box, type the package you look for and hit enter. In this example, I just searched for “routedebugger” package and installed it by clicking the “Install” button.
Step 4:
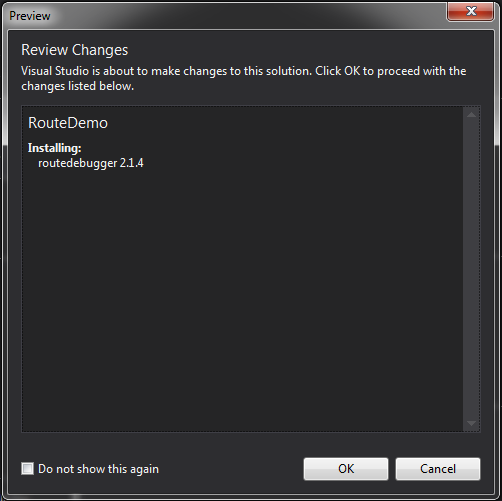
While installing if the downloaded package tries to change the files in the solution/project it will popup the dialog to warn us. Just click “OK” for it and you can see the “installation progress” in the Output window.
Step 5:
Now you can just expand the “Solution Explore” window, see in the “Reference” to check that particular reference is added or not.
Uninstall NuGet Package using ‘Nuget Package Manager’:
Step 1:
If you want to uninstall, again go to the “Nuget Package Manager” and search for the particular package.Visual Studio automatically finds that particular package is installed on not and now you can see the “Uninstall” button.
Step 2:
Since it made some changes in the project while installing, so it will automatically revert the changes in the file. So again it will popup the dialog. just click “OK”. Also in output window you can see the uninstall status.
Install NuGet Package using ‘Package Manager Console’:
Alternatively, you can use the “Package Manager Console” in Visual studio to install the necessary packages by running the respective command.
Step 1:
Go to www.nuget.org and type the package name in the search box and go to the particular package’s page, there you can find the “Package Manager Console” command.
Step 2:
To open the Package Manager Console, Tools –>NuGet Package Manager –> Package Manager Console.
Just copy the command from above website and paste it on the package manager console and hit enter.
Note : Before hit enter key, just check the project name in the “Default project” dropdown. Incase, if you have lot of projects, you must pay attention on this by selecting correct project.
Uninstall NuGet Package using ‘Package Manager Console’:
Step 1:
In order to uninstall, just type the below command in the “Package Manager Console” and hit enter, it will uninstall the package: Uninstall-Package routedebugger.
That’s all! Hope this will helpful for someone!! Let me know your thoughts as comments!


0 comments :